
Stretching articles and article lines
Access
Ribbon : Designer > Article > Insert an article in the drawing area
After changing the dimensions of an article that is present in the order
General Information
If you wish to vary the dimensions of one or multiple articles, the methods Stretch article and Stretch article line are available in the quick access toolbar (PLAN) or in the Ribbon menu index tab Article Designer.
The article stretch mode is automatically activated in the drawing area after you have changed the height, width and/ or depth of an article in...
- the Article Designer,
- the Configurator or
- the iXplorer Properties Palette
... . This allows you to determine the orientation of the extrusion, independent of whether or not the article is part an article line or not.
See Insert articles .
Procedure
First click the method Stretch article, then select an article. Confirm your selection per right-click / ENTER; red colored grips appear on all article sides. An arrow indicates the stretch direction when you move the mouse pointer over the grips. Click the grip indicating the direction you wish to stretch the article.
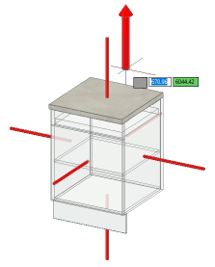
There are several options available to stretch the article:
By default it is possible to enter the coordinates of a point in the coordinate system in the pointer field or snap the points from AutoCAD.
However, it is more practical to use the commands Overall- and Increase in size . For the latter the pointer field changes to dynamic dimension input: for the overall size specify the actual width of the article or the article line; for the Difference specify only the dimension by which the article or selected elements of the article line is to be stretched or squashed (negative value). Confirm your selection per right-click / ENTER.
The change in dimension is not applied immediately to the article – you can check the result in the preview as well as repeat the stretch procedure by again clicking on a grip. Please observe that this does not cancel the previous input specifying the increase in size.
Terminate all stretch procedures per right-click / ENTER.
To cancel the last command click ESC.
The difference between the methods Stretch article line and Stretch article is as follows:
Select one or several articles to be stretched; All articles arranged flush with one another form the article line. For example, in a corner kitchen unit the cases which follow the corner cabinet on the other side panel also belong to the line. Another example is a tall cabinet with an adjacent wall- and base cabinet line.
It is possible to add articles to the article line using the command Add objects – conversely, it is possible to remove articles from the line using the command Remove objects . Click the corresponding article in the drawing area, then confirm your selection per right-click or by pressing ENTER.
Only selected articles in the line will be stretched by the specified increase in size. However, their proportions are retained, as is the case with linear division of the article line.
Example:
The widths of the rows of wall and base units of a kitchen differ, but are inserted next to the same tall cabinet. To make both rows of units align the same, the wall cabinets are to be stretched to the left.
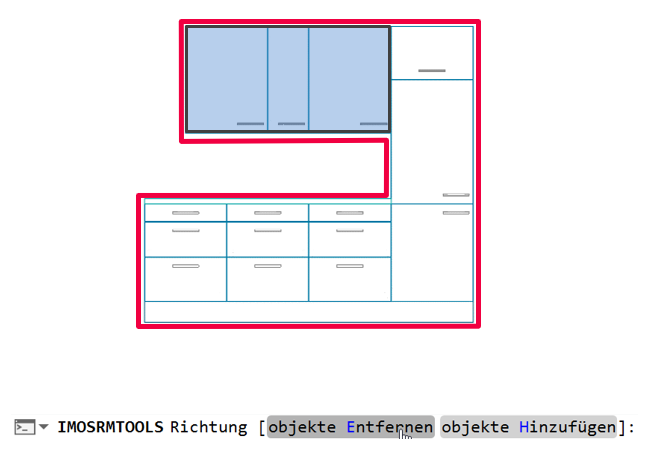
During the stretch procedure the article line is interrupted by removing the tall cabinet using the command Remove objects to also exclude the base units from the line.
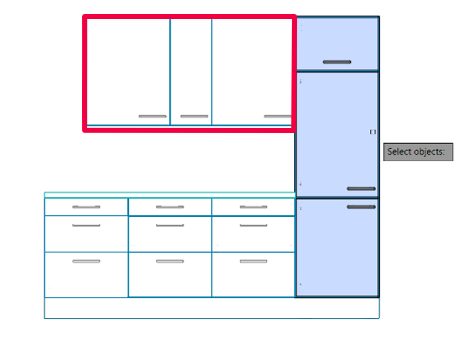
These would create gaps between the individual cabinets due to the alignments that do not match the wall cabinets when calculating the linear divisions. Gap-free stretching is guaranteed if they are excluded.
Key words: altered edited editing dimensional reference red white arrows rods cross