
The new principle for QR- and bar codes
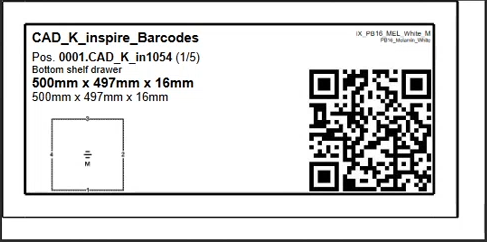
In addition to the standard barcode in the imos options, you can now also generate additional barcode types in parallel, in order to use them in reports, parts lists, or on labels. The following types are available:
- QR Code
- Code_39
- Code_93
- Code_128
- EAN_8
- EAN_13

QR codes contain much more information than common barcodes – they are ideal for simplifying the flow of information during production.
As a practical example, we will select the barcode type ‘QRcode’ and set one of the five object levels:
- Plan position
- Article
- Sub-assembly
- Part
- Program
We plan to record all PXM workflows that a part must go through within the QR code – therefore we select ‘Part’ as the object level.
Define the image properties in the output format category. As a default, these properties include the file format and the height and width of the image. Depending on the type of barcode, there may be additional properties, e.g. QR codes require a margin (in pixels), and entry of an error-correction level.
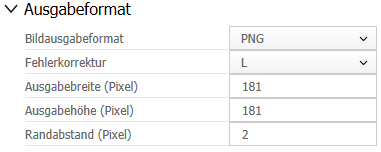
The margin is part of the image height/width and should be at least 4 QR modules (boxes) wide. In addition, the ideal image dimensions also depend on the camera resolution and the distance at which the image is photographed.
Error correction specifies the degree of damage at which the codes should still be readable. There are four different degrees:
- L = Low, readable with up to 7% damage
- M = Medium, readable with up to 15% damage
- Q = Quartile, readable with up to 25% damage
- H = High, readable with up to 30% damage.
Save a condition as an object filter in the Content category that filters all elements for which you wish to create QR codes. Then define the text contents in the table under it:
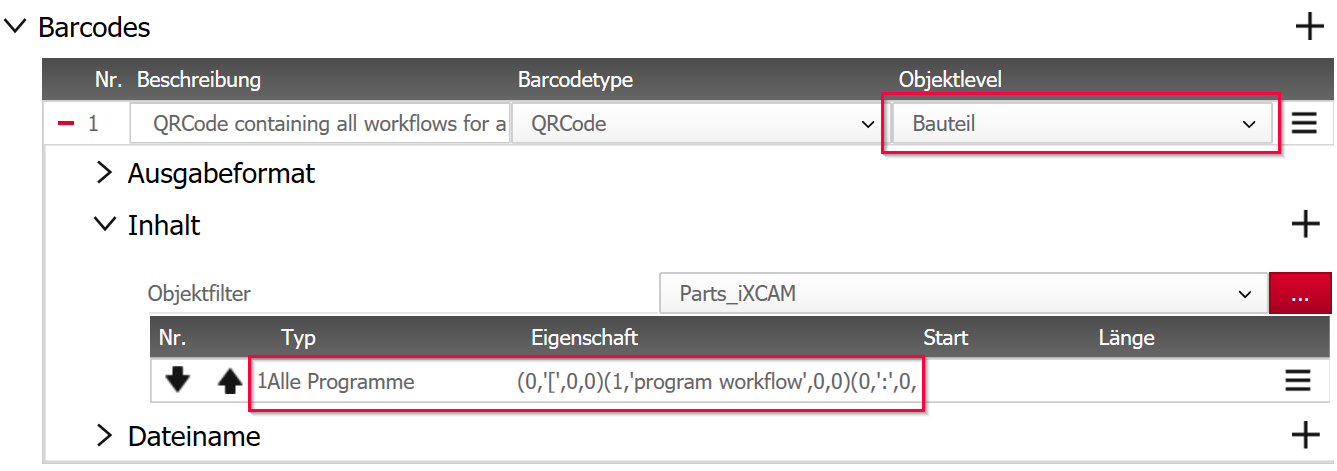
Use the plus symbol in the top right to add text sections. For each section, define:
- the type
- as ‘complete length of the attribute’
- as ‘set text’
- the ‘beginning/end of the attribute’
- In addition, the relevant sub-levels for the selected object level are available for selection: all articles/sub-assemblies/parts/programs
- the ‘property’ that you wish to adopt with the text (the selection depends on the type selected)
- a ‘start’ position and a ‘length’, if you selected the type ‘beginning’ or ‘end of an attribute’
If you need to, change the sequence of the text sections using the arrows located to the left of each line.
If you need to, change the sequence of the text sections using the arrows located to the left of each line.
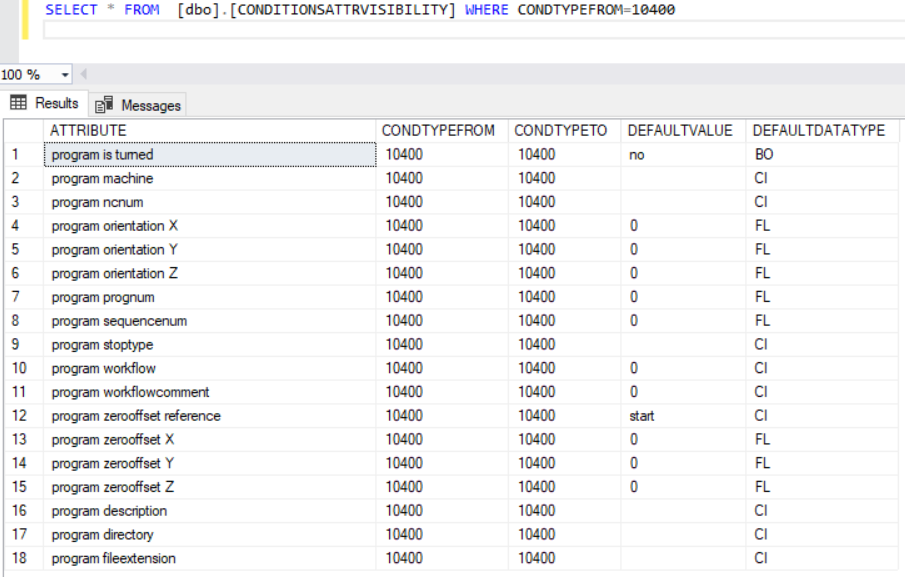
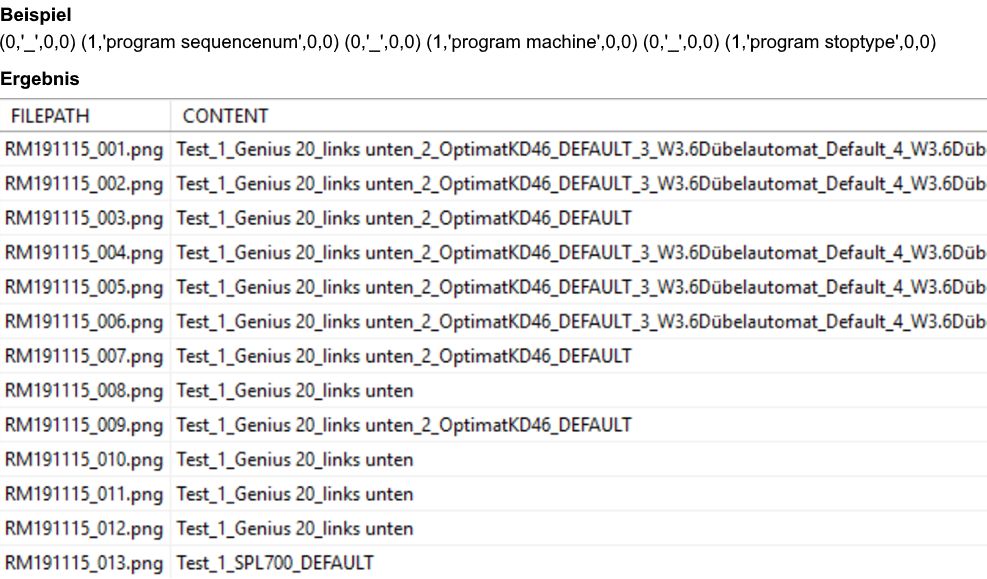
For our practical example, we will select the type ‘All programs’. The properties field allows for a formula value in order to attach several attributes to each other at a time. Possible program attributes in the formula are served by the table BARCODECONTENTATTR.
The formula syntax is as follows:
it consists of any number of attributes, which in turn are made up of four fields. The fields are separated by commas and each attribute is enclosed by brackets: (<type>, '<att>', <length>, <start>).
The fields represent the table columns type, attribute, start, and length.
|
Field |
Description |
|
<type> |
Type (table: BARCODECONTENTATTR; column: ATTRIBUTETYPE): 0 = fix value 1 = complete length of the attribute 2 = attribute start 3 = attribute end 500 = all programs 1000 = all parts 2000 = all sub-assemblies 2100 = all articles 2200 = all plan positions |
|
'<att>' |
- Attribute (object property) as an internal program name - possible values for ‘All programs’ can be found in the ATTRIBUTE column in the CONDITIONSATTRVISIBILITY table, where CONDTYPEFROM=10400 |
|
<length> |
- Length as of start position - Number as in the table column ATTRIBUTELENGTH |
|
<start> |
- Start position - Number as in the table column ATTRIBUTESTART |
In the final category, file name, you can select how you want the QR code to be named and save the principle.
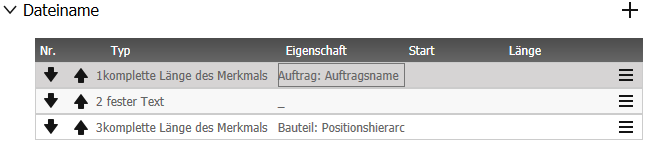
In the final category, file name, you can select how you want the QR code to be named and save the principle.
Initiate the process data transfer to generate the required PXM data. In order to generate the QR codes for an order, set the desired principle in the barcode field within the iX CAD ‘Save Order’ window. If you click on ‘Save’, the program will automatically generate the barcodes. They will be saved in the order directory under Factory/Imorder/ <order name>/BARCODE/<defined output path>.
In the event that you require parts lists with barcodes and parts lists with QR codes, both types will be separately listed in the ‘Create BOM’ dialog.
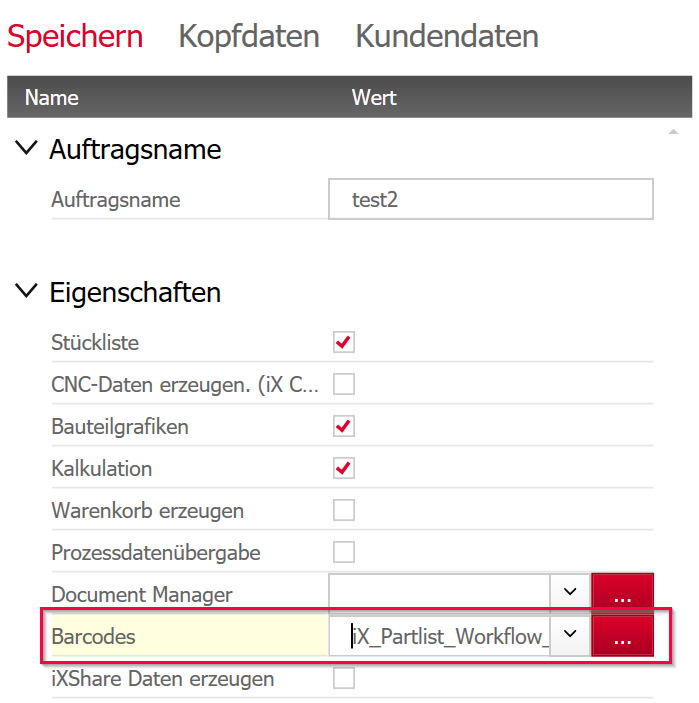
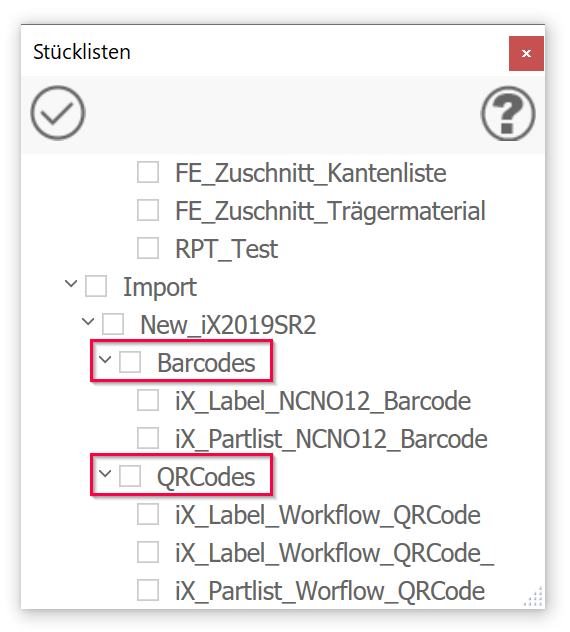
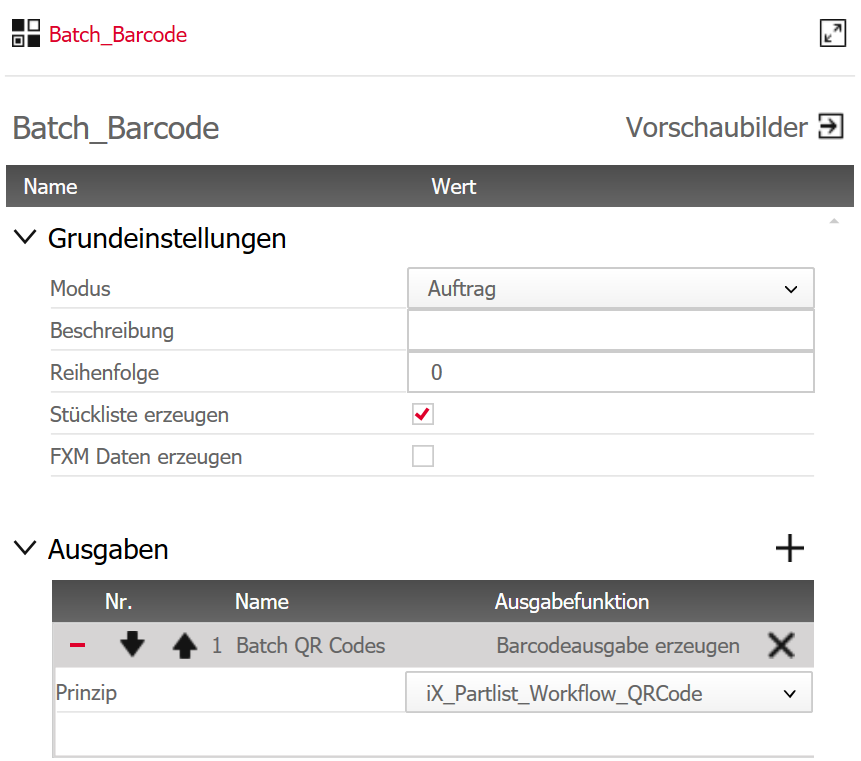
In the Integration Server, you can add to a barcode output batch in the ‘Order’ mode by adding an output with the function ‘Create barcode output’ and defining the barcode principle below it.
If you prefer to create your own report principles containing QR codes, instead of using the delivered report principles, enter the following value in the relevant RDL field:
=IIF(IsNothing(Fields!BARCODE_BITMAP.Value),nothing,("file:///" & Parameters!IMORDERPATH.Value & "\" & Fields!ORDERNAME.Value & "\BARCODE\" & Fields!BARCODE_BITMAP.Value))
The IF command catches the cases for which no QR code has been created for an object.