Extended Import of Digital Measurements
iX 2023 SR2 offers users of the Flexijet measurement system additional options for data integration.
- Flexijet Installation Symbols: Import installation symbols from Flexijet as installation articles in imos iX
- Flexijet DWG Drawing: Load and display Flexijet DWG drawings in the project drawing
- DCO Package with Sample Data
Importing Flexijet Installation Symbols
Prerequisite: FlexiCAD Version 4, capable of exporting imos-compatible XML files with installation symbols and FlexiCAD DWG files (scheduled for release around October 2024).
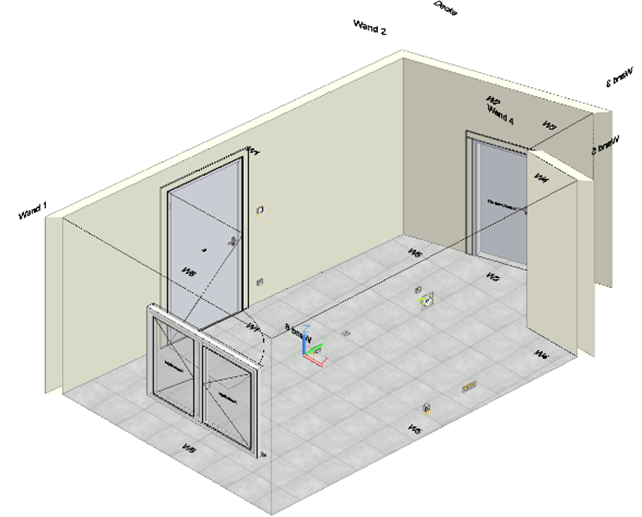
If you import a Flexijet measurement that contains installation symbols for building services, you can optionally import them. During the import, the symbols are replaced by installation articles and inserted into the drawing according to the measurement data. The Article principle used to replace an installation symbol is defined in a 'Room Import' principle.
Info: An Article principle is an installation article if “Kind of Article” = “Installation Object”.
Procedure for Creating the Required Master Data:
To ensure that the Flexijet installation symbols are displayed as imos installation articles after the room import, they must be linked. The new 'Room Import' principle is used for this purpose.
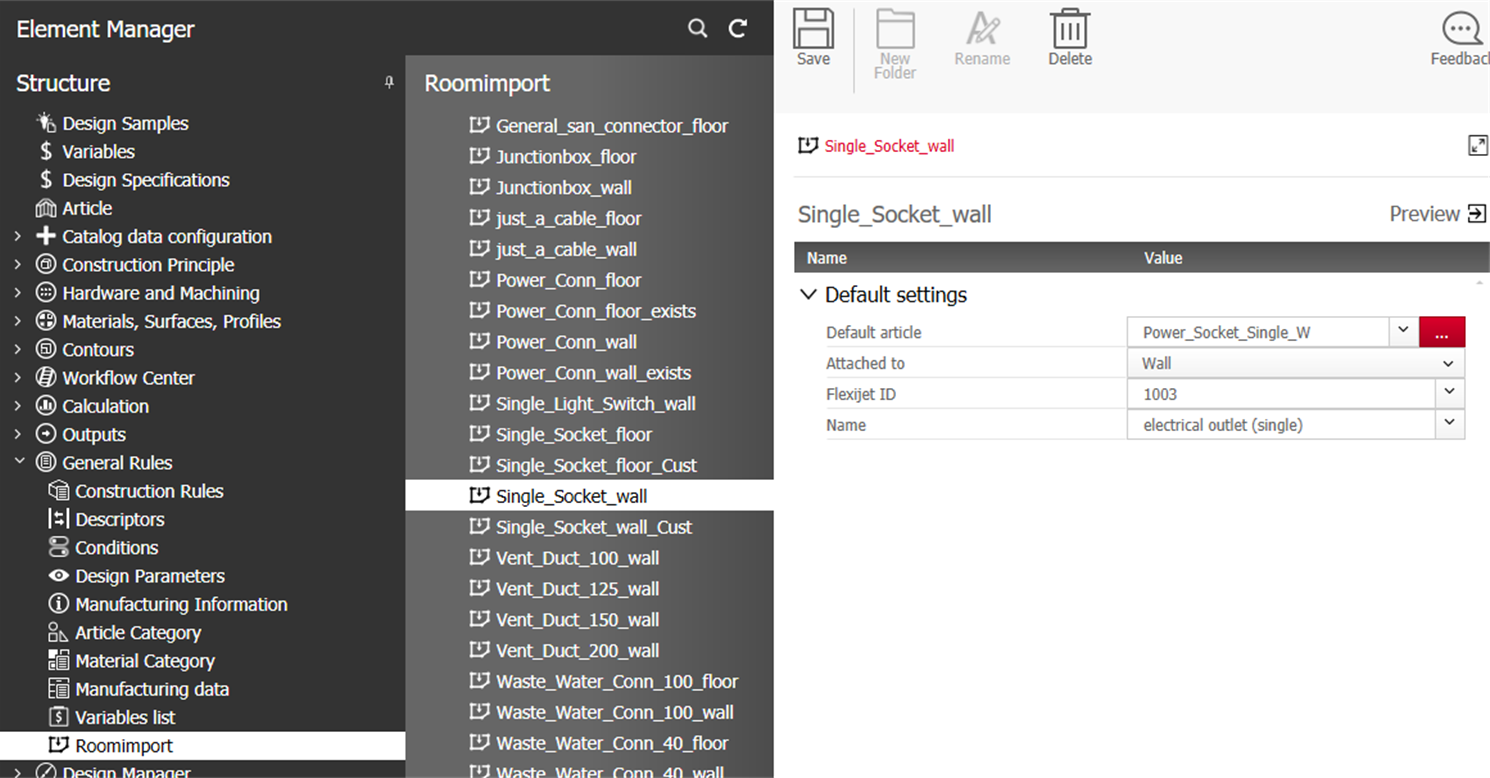
- Go to Element Manager > General Rules > Room Import.
- Save the "STANDARD" principle under a new name.
- Assign an article principle in the "Default Article" field. The principle must meet the following requirements:
- "Kind of Article" = "Installation Object"
- Recommendation: If an Article principle with "Kind of Article" = "Installation Object" is assigned an Article Category, the Insertion Height should generally not be entered. This recommendation applies regardless of whether the Article principle is used in a 'Room Import' principle or not. An entered Insertion Height can obstruct the manual planning of installation articles.
- Depending on where the object is installed, choose one of the options for “Installed at”:
- Wall
- Floor
- Enter the ID of the building services symbol from the Flexijet drawing in the
"Flexijet ID" field.
Info: To obtain available "Flexijet IDs", please reach out to Flexijet support or utilize the included DCO package. The 'Room Import' principles within the package include all "Flexijet IDs" currently available as of May 2024.
- Enter any name for the used "Flexijet ID" in the "Name" field.
- Click "Save".
Note: In multiple 'Room Import' principles, article designers may appear multiple times, but each combination of Flexijet ID and 'Installed at' value may only occur once in all 'Room Import' principles.
Result: During a Flexijet room import, any building services symbols present in the export are replaced by imos installation articles if corresponding 'Room Import' principles are defined.
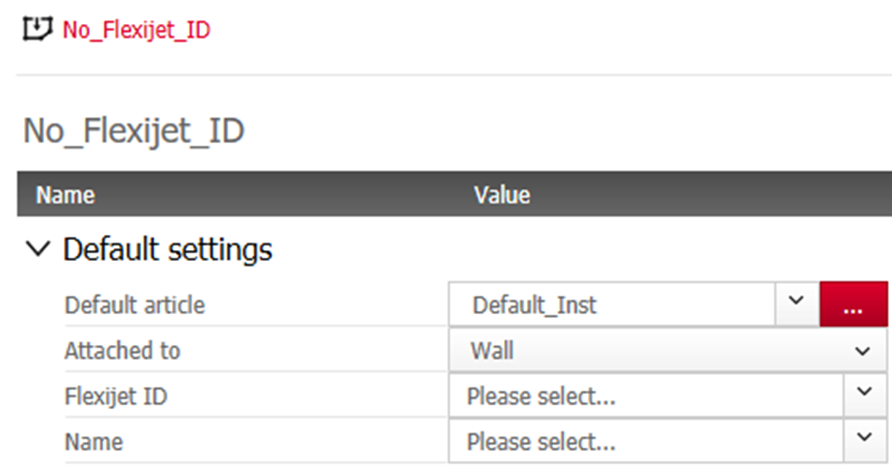
- Name of the 'Room Import' principle = '_no_flexijet_ID' (the character '_' at the beginning ensures that the principle is evaluated before all other principles)
- Flexijet ID = [leave empty]
DCO Package for Extended Flexijet Room Import
imos provides a DCO package with data optimized for Flexijet room imports with building services symbols. The DCO package called 'Installation Objects 3.0' contains the following imos data:
- Installation Articles
- Dimensioning Principles
- Labeling Principles
- Labeling Symbols
- Room Import Principles
Room Import Principles in the English imos DCO Package: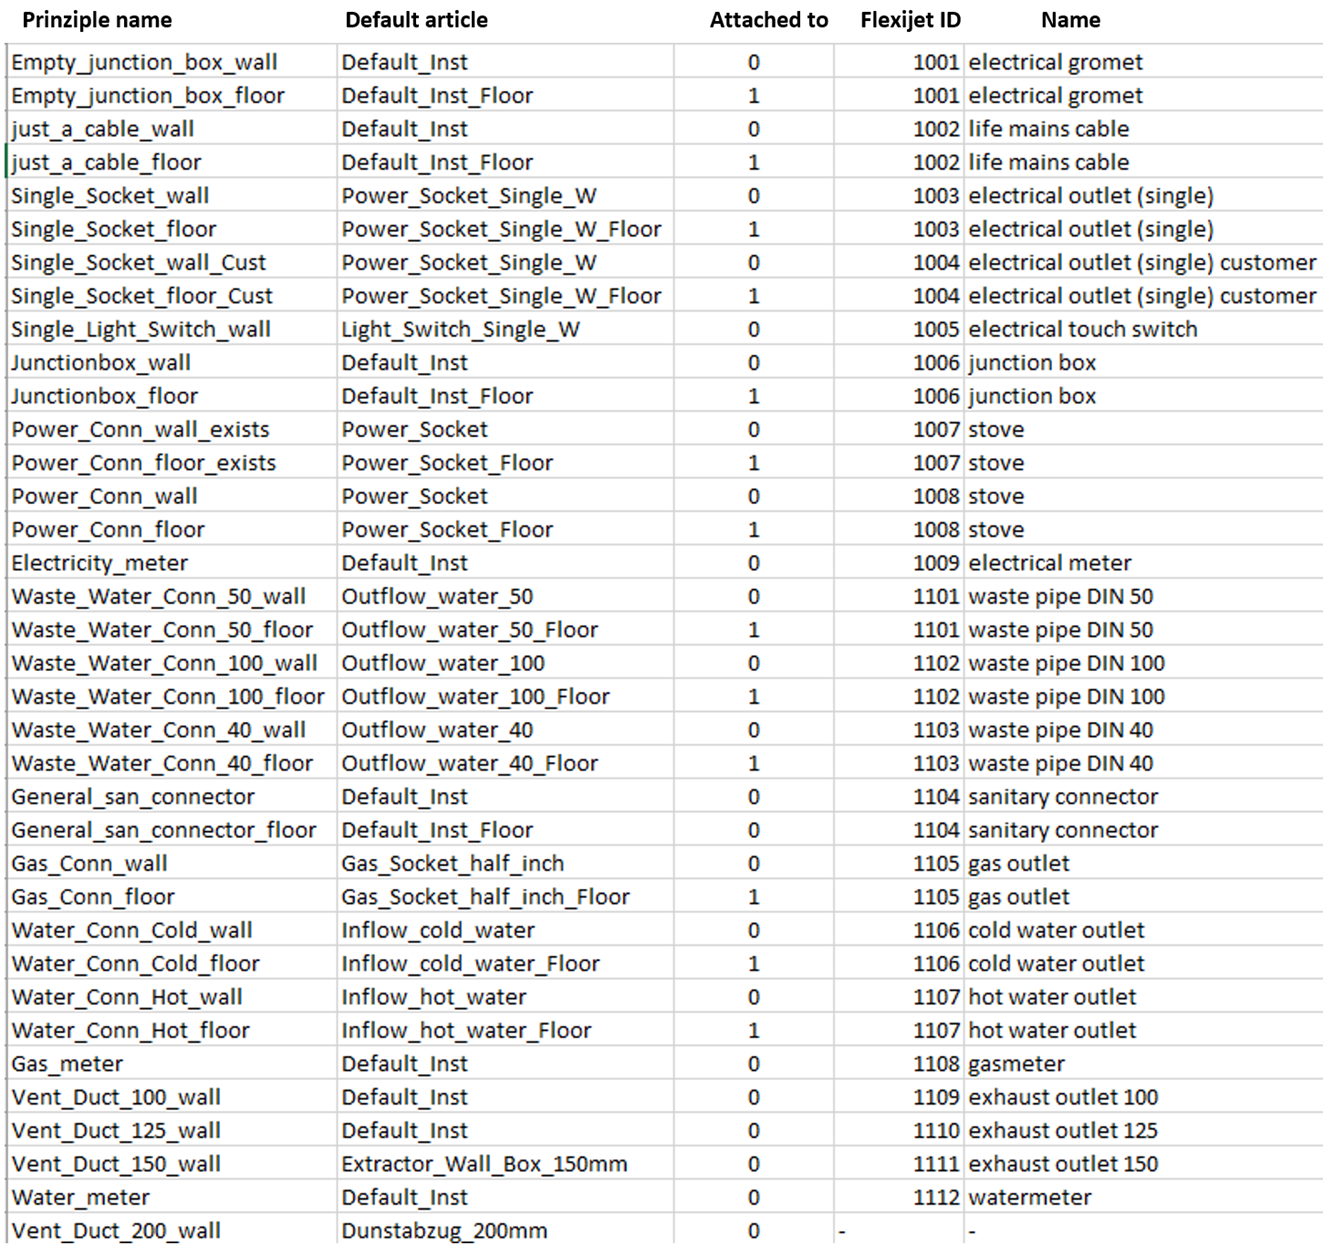
Room Import Principles in the German imos DCO Package: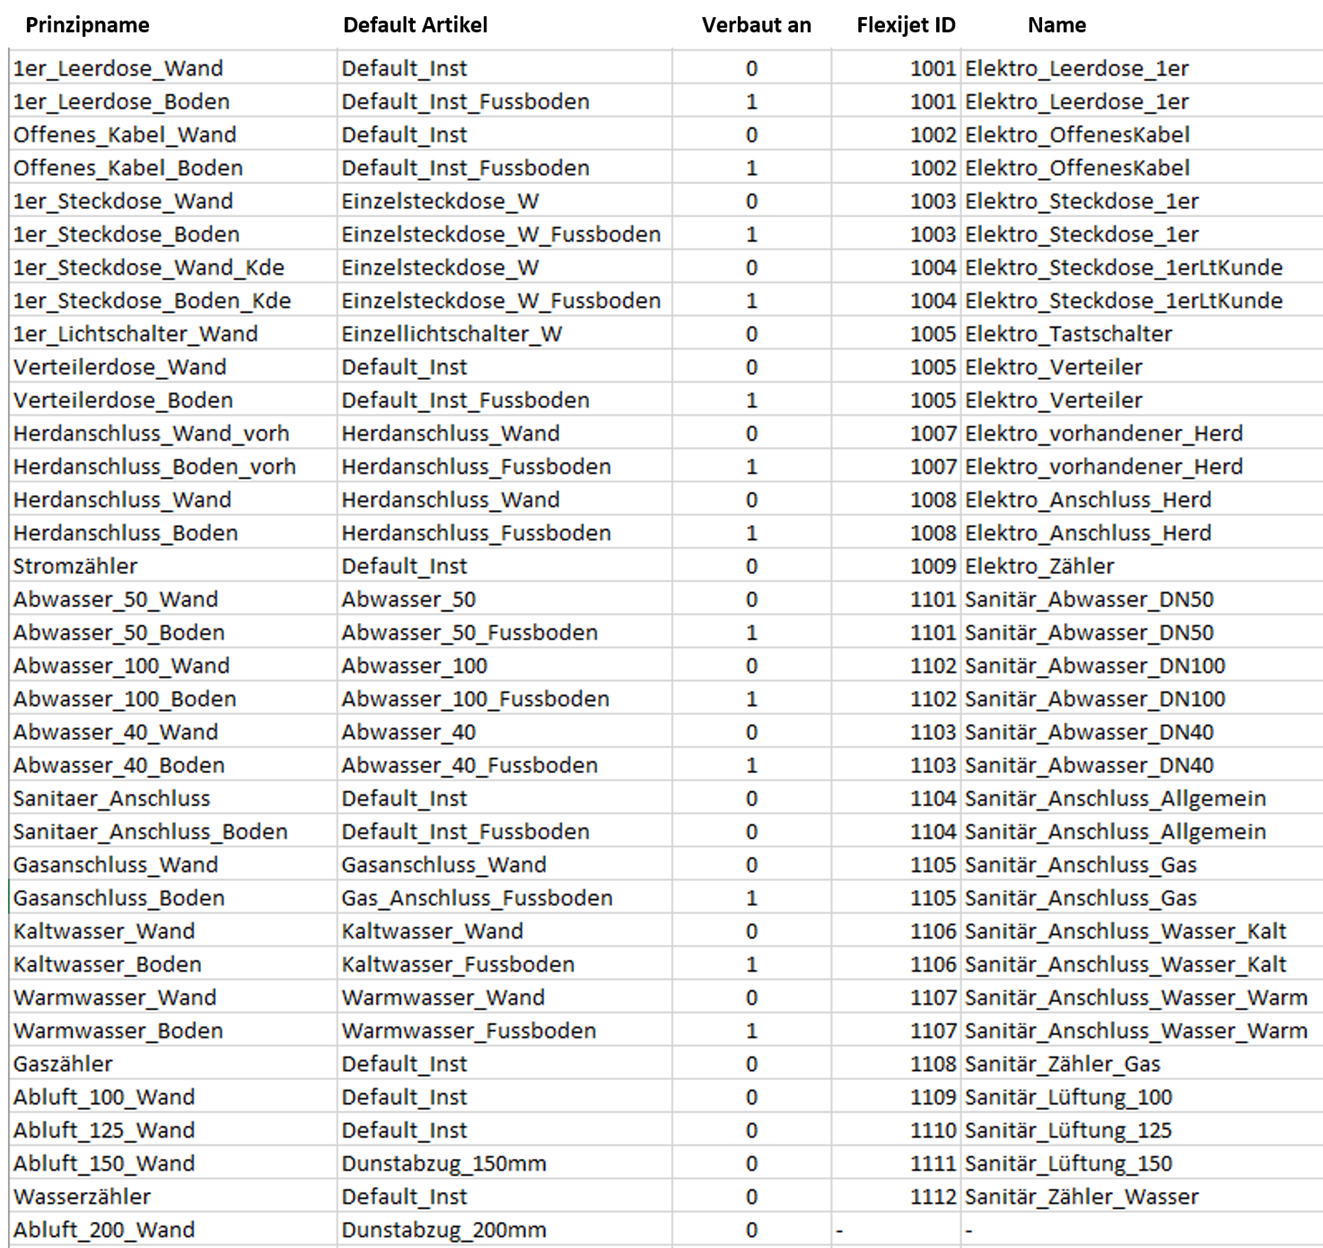
Importing Flexijet Room and DWG into iX CAD/Plan
Prerequisite: FlexiCAD Version 4, capable of exporting imos-compatible XML files with installation symbols and FlexiCAD DWG files (scheduled for release around October 2024).
- Start iX CAD or iX Plan.
-
Select the "Import Room Measurement" option from the "Room" group dropdown menu.
A file selection dialog opens. The directory <Factory>\ROOM\INBOX is preselected in the dialog.
-
Select the desired Flexijet export file.
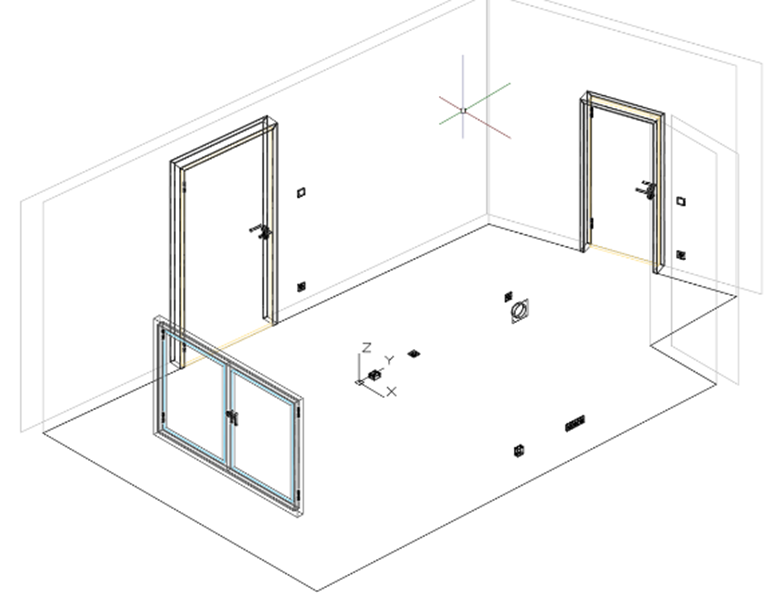
iX CAD/Plan then creates the room if wall information is present in the Flexijet export.
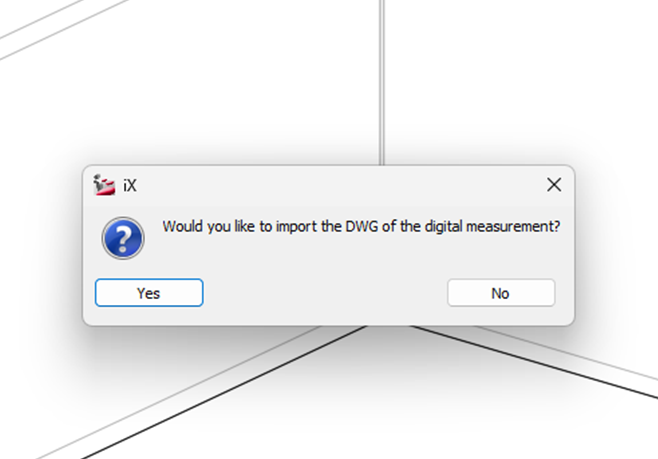
Then you will be asked if the measurement DWG should also be imported.
-
If you do NOT want to import the measurement DWG, click "No".
The process is completed.
-
If you want to import the measurement DWG, click "Yes".
The Flexijet DWG is imported and placed in new layers. The process is completed.
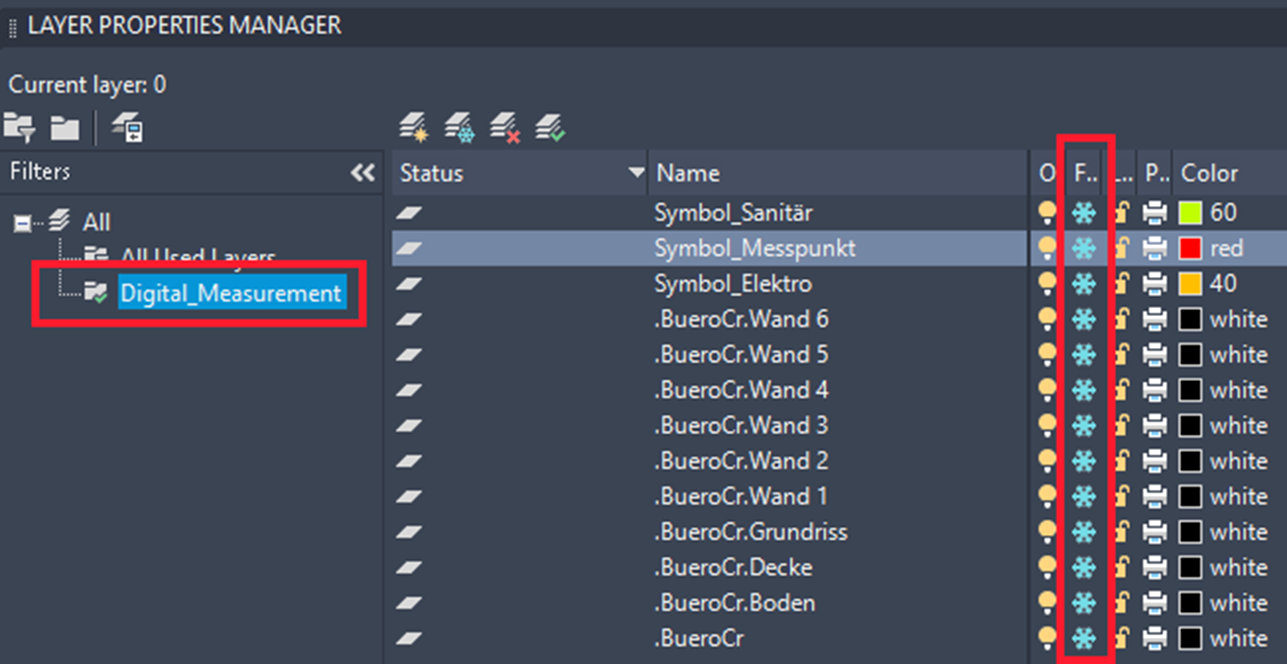
By default, the "Flexijet" layers are "frozen", meaning they are invisible.
-
-
To make the Flexijet DWG visible, enter the command "_LAYER" in the command line. The Layer Properties Manager opens.

Thaw the desired layers in the Layer Properties Manager.
Tip: The "Digital Measurement" filter clearly displays the "Flexijet" layers.